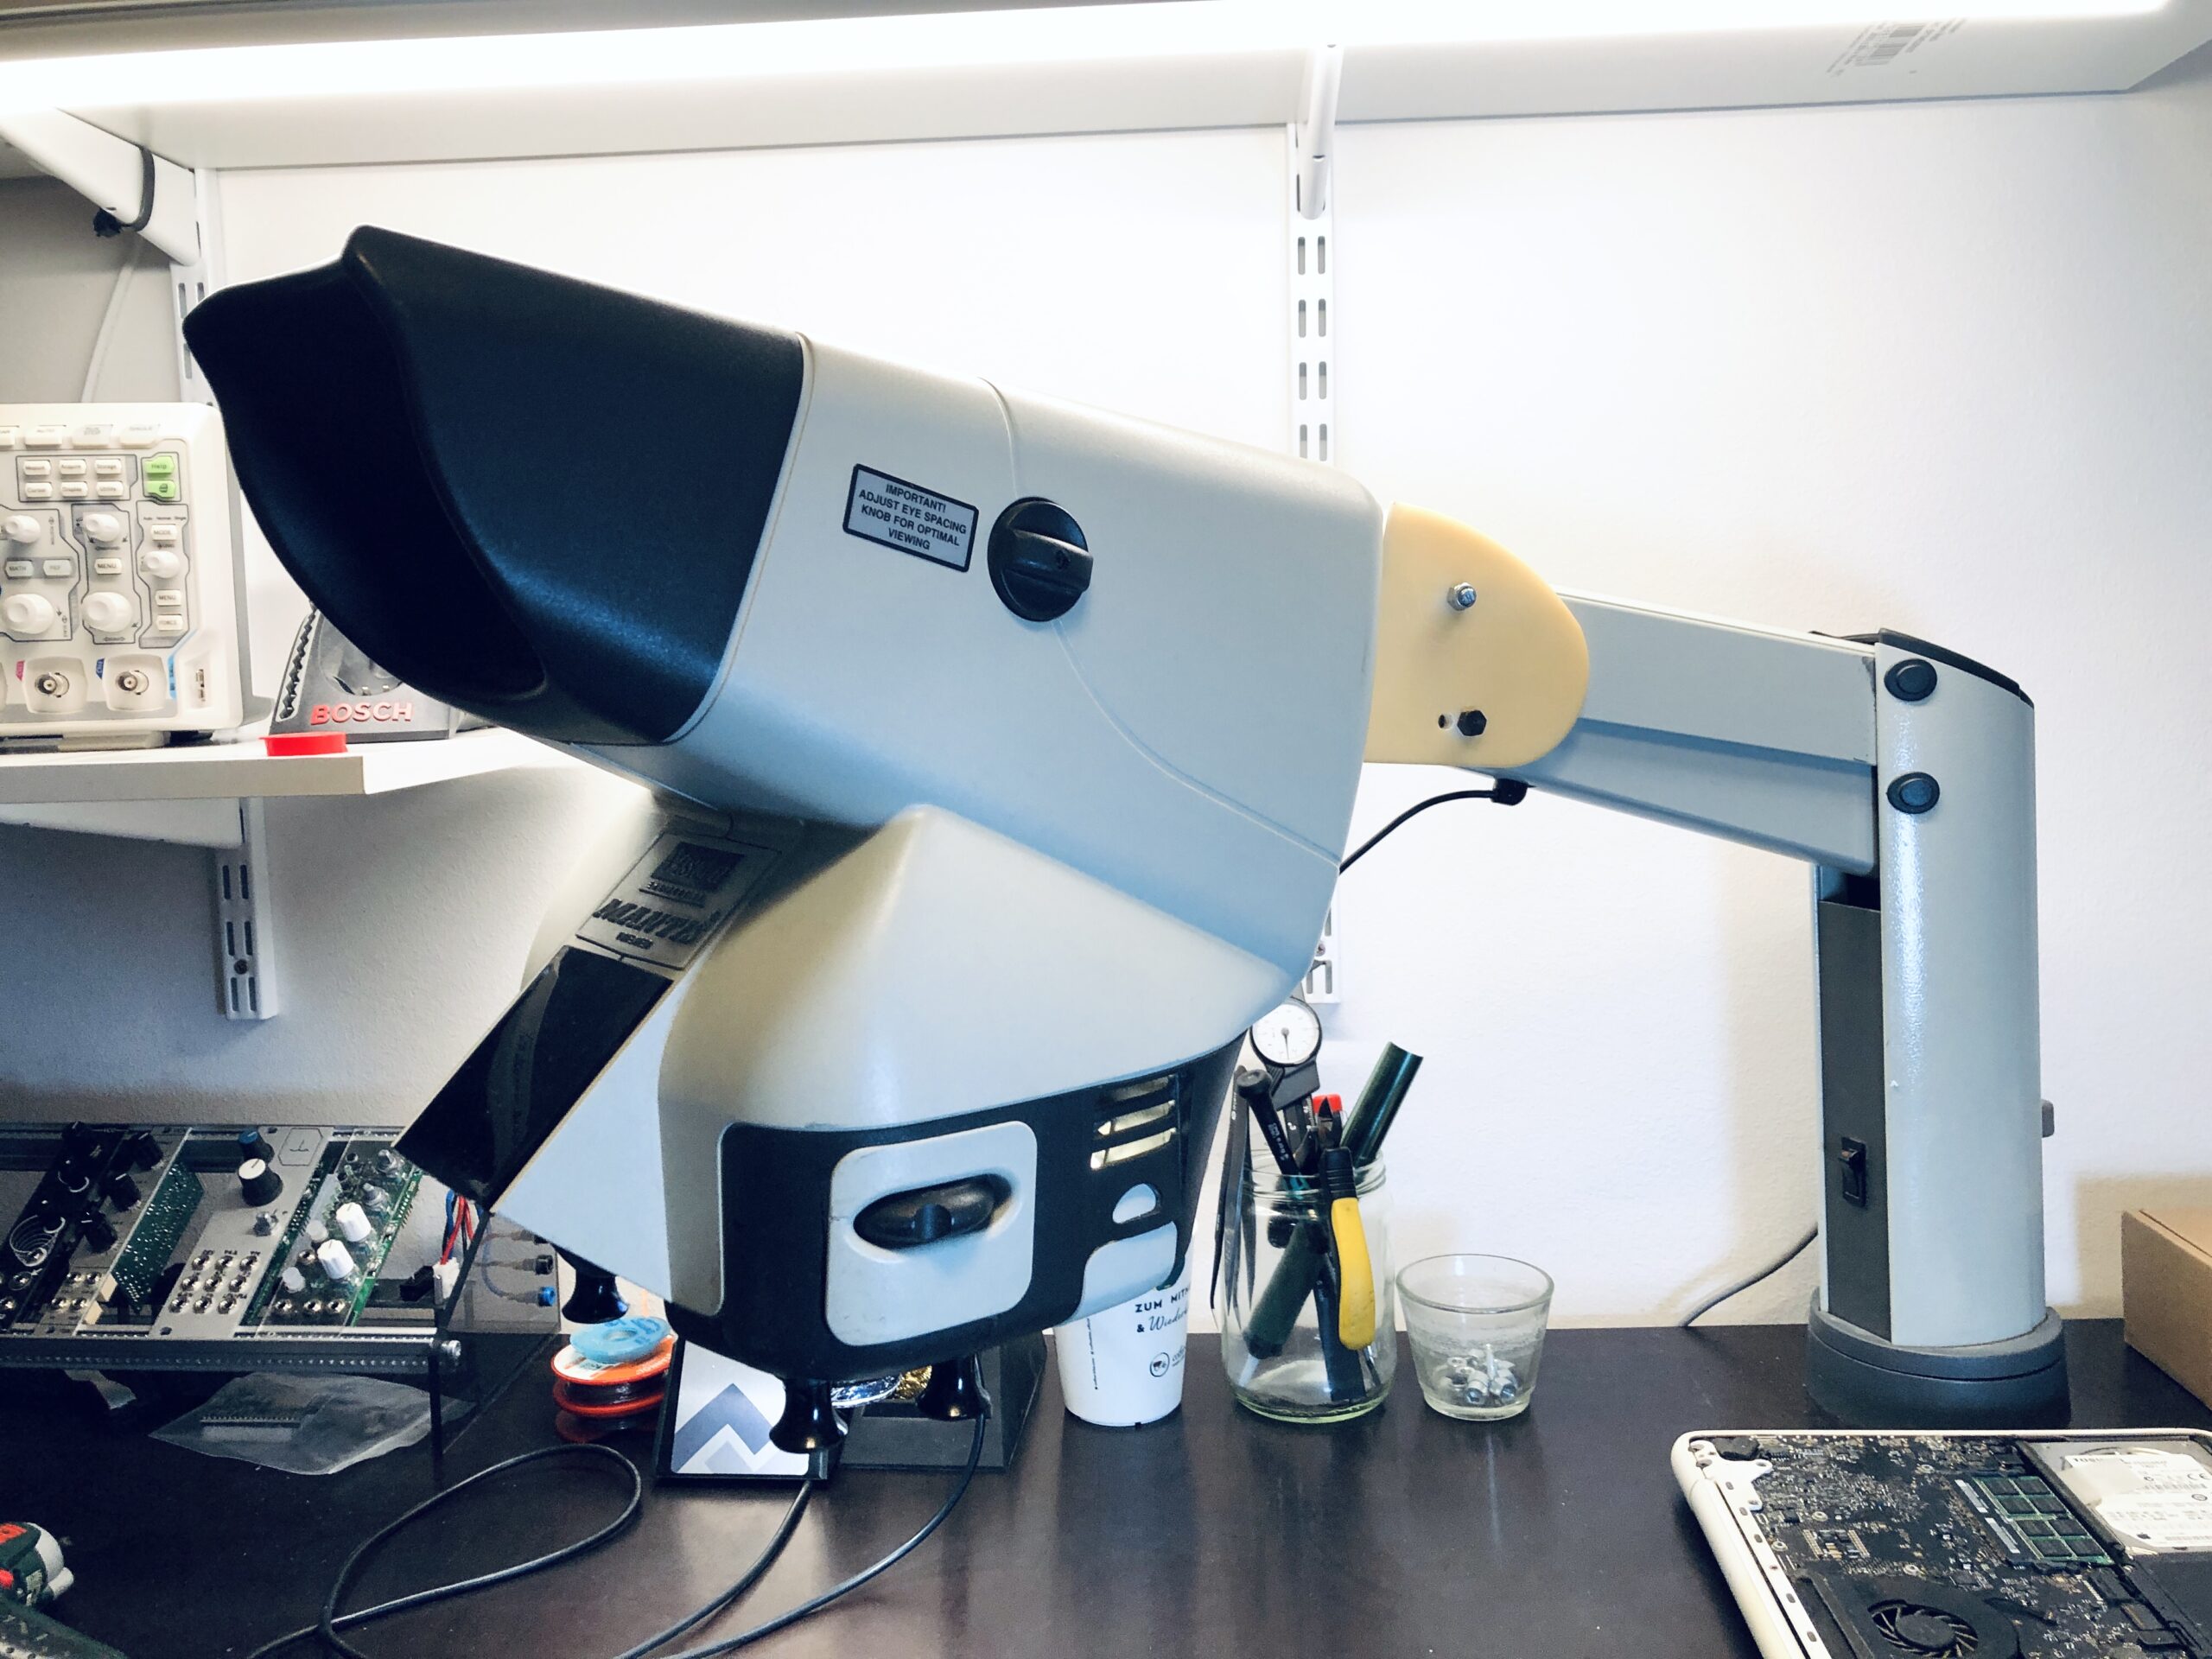
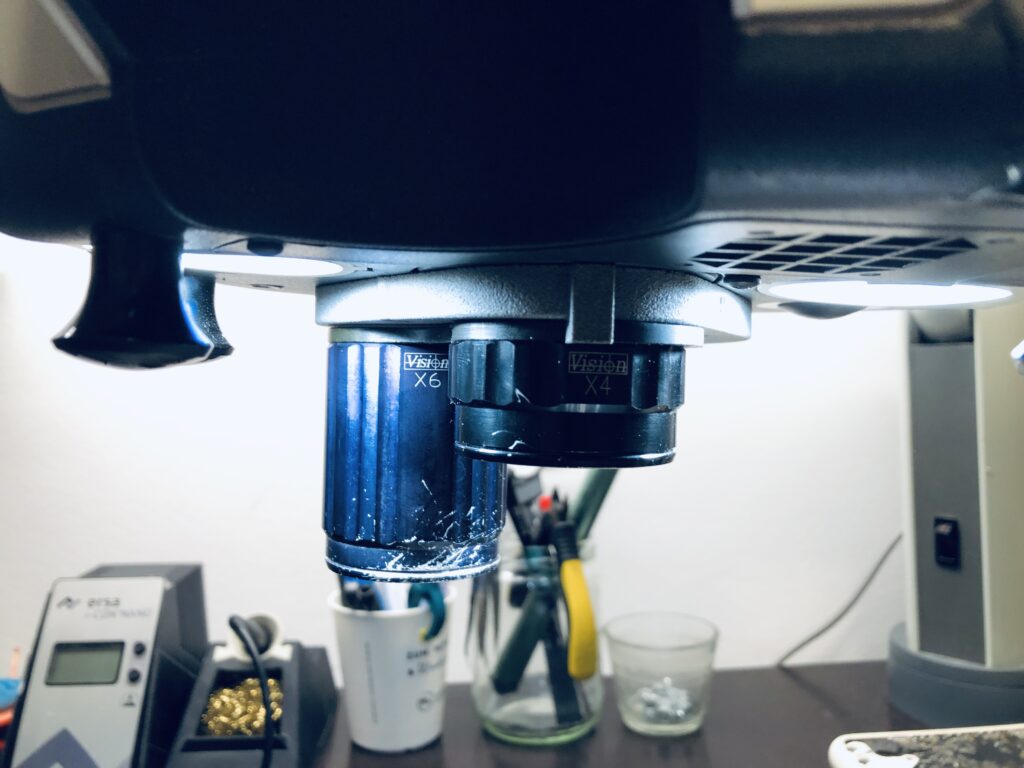
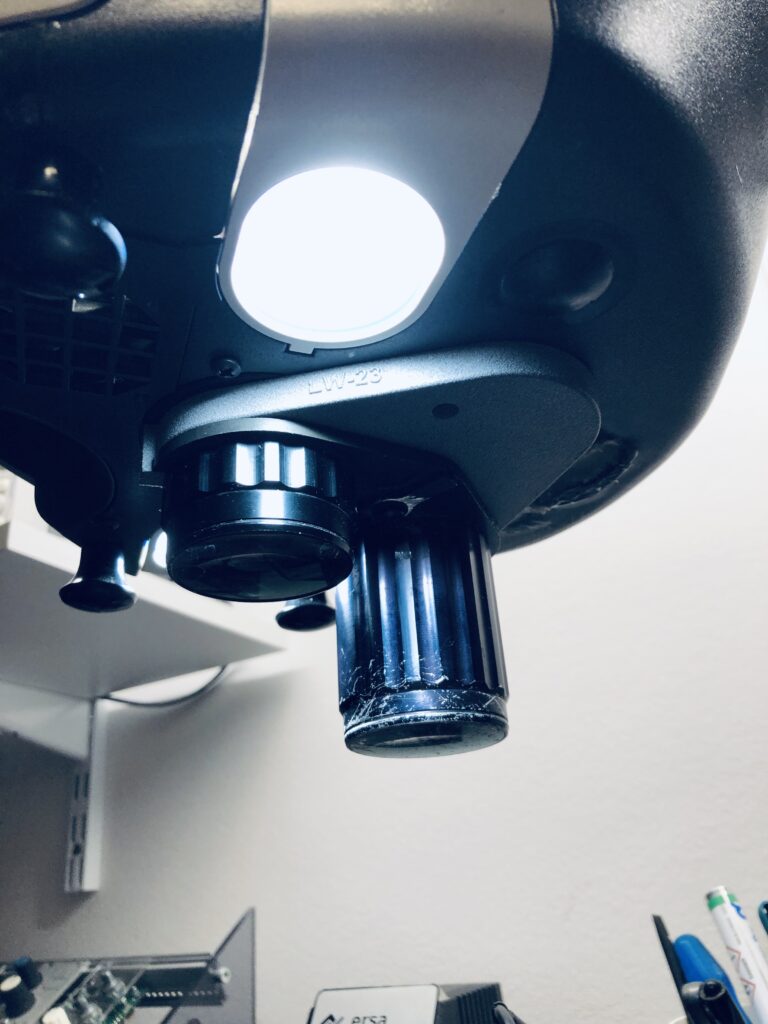
I am lucky to call myself an owner of an original Mantis stereo inspection microscope from Vision Engineering.
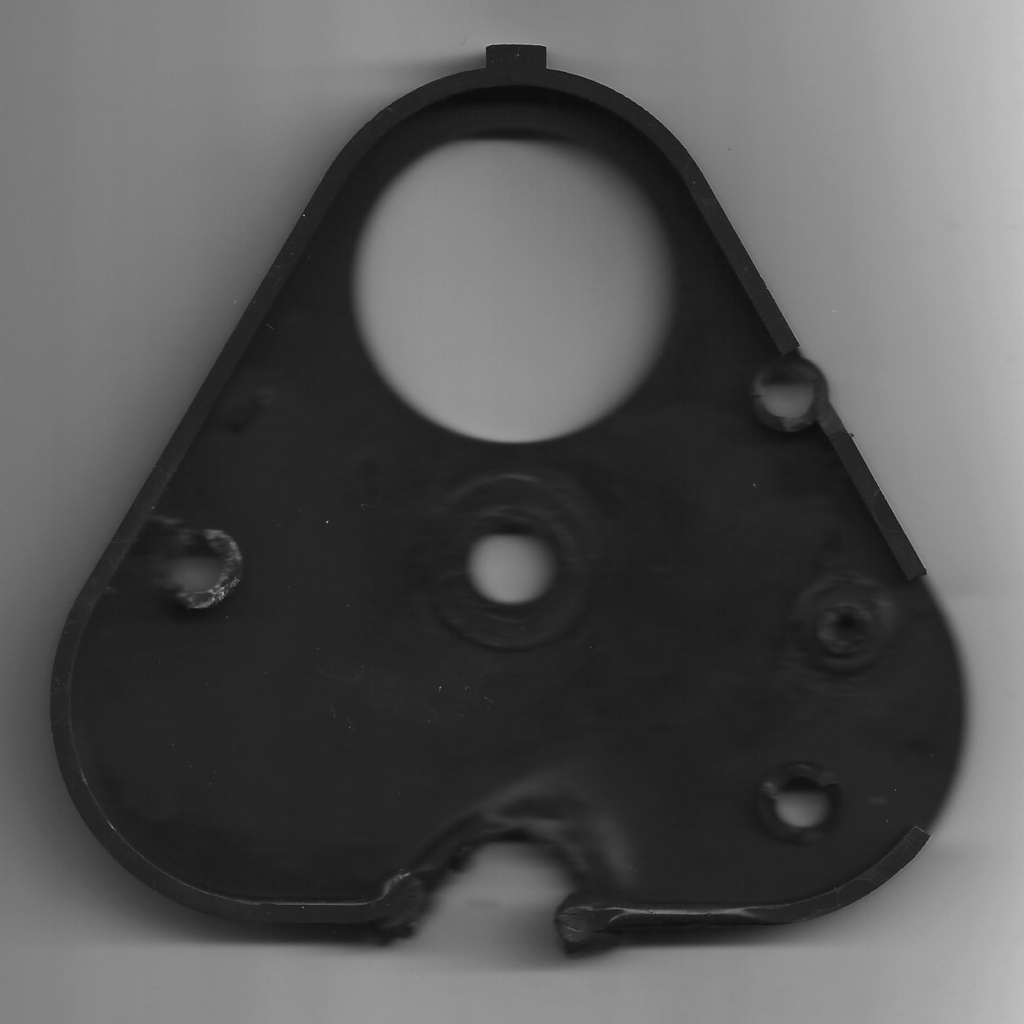
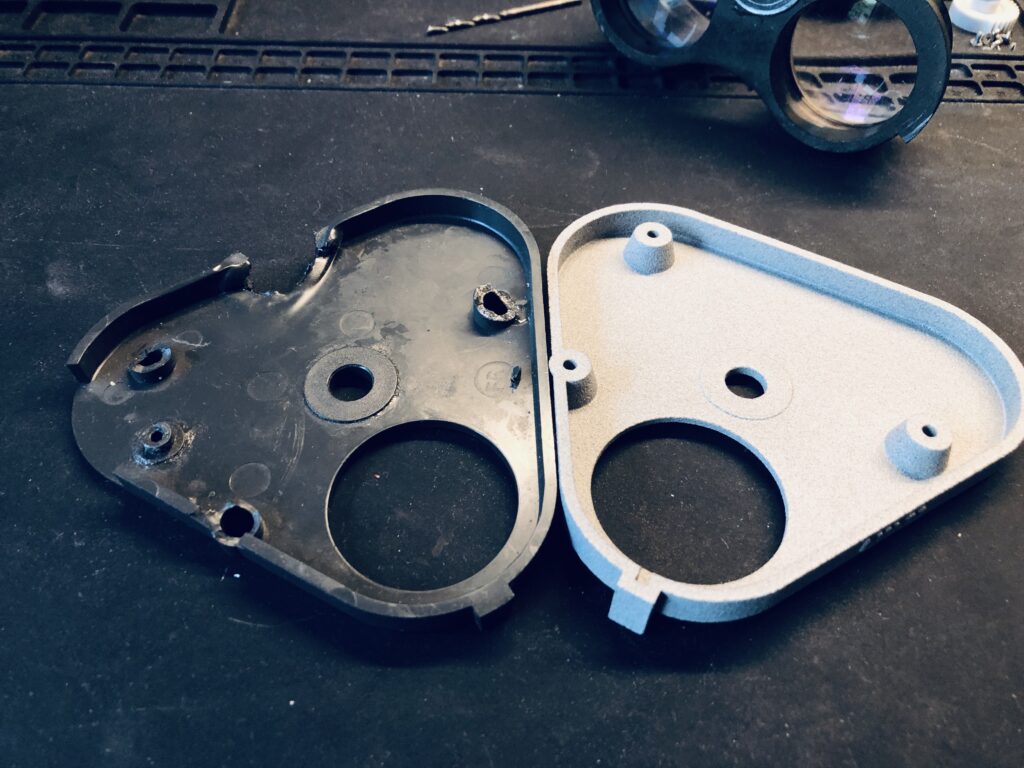
Unfortunately I broke a pretty critical part while moving. It’s this grey plastic plate where the lenses are mounted, that enables quick changing between two different zoom lenses. (After some research I found this EEVblog thread that included the microscopes Service and Repair Manual. This document lists all spare parts of the microscope and their names. The part I am talking about is called ‘Lens Turret Assembly’.
A while ago I already had an incident with the same microscope (they are really not made for moving!). Last time the yaw hinge suffered damage during a move but luckily after a quick online research I found this Hackaday article where a fellow Mantis owner already designed a replacement hinge using Fusion 360. I downloaded the step file and ordered a 3D print at JLCPCB. It took less then 30 minutes 🙂
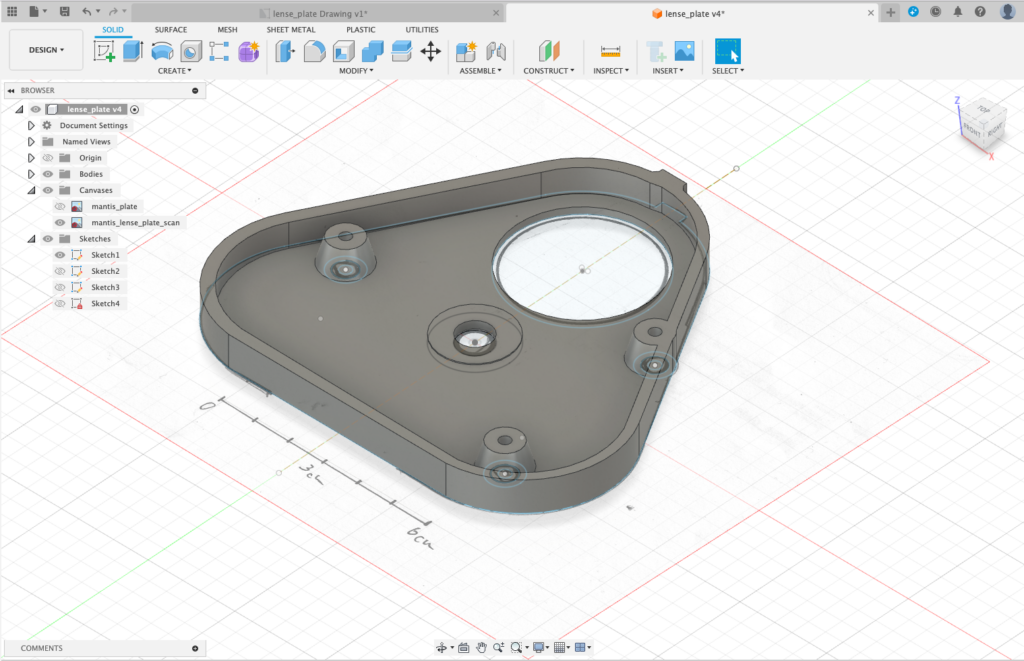
Unfortunately this time it wasn’t that easy and I could not find a 3D file online. Thats why I remodelled the part in Fusion 360 myself. I’ve made the step file available for download on my GitHub. Hopefully this will be as beneficial to others as the Hackaday article was for me in the past.
Modelling Procedure
My initial idea was to scan the original part and import the picture to Fusion360. Based on that I wanted to remodel it. I quickly realised that this is not a very promising method. The scan was just too blurry and I could not properly sketch the outlines in Fusion.
I then simply transferred the external dimensions onto a sheet of paper and scanned it. I also added a scale to easily resize the image in Fusion 360.
I also closed the recess for the lever during the redesign. I did that because some of the gearwheel tooths were already broken in my case and honestly this mechanism had no added value for me. I simply grip the lens directly and move it that way.

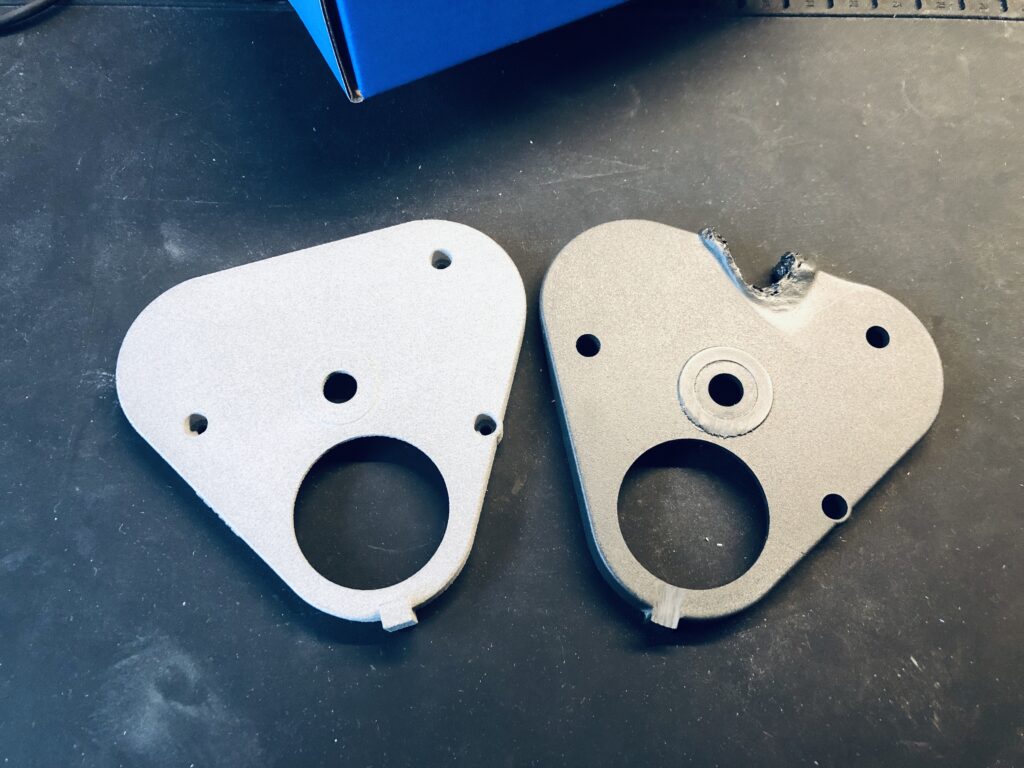
I again chose JLCPCB’s 3D printing service for this part, because I don’t own a 3D printer yet. I chose the MJF Multi Jet Fusion printing Process and the Nylon Material PA12-HP. MJF parts are supposed to be much sturdier, stronger and more durable then for example SLS (Selective) prints.1
That sounded perfect! After two weeks of waiting for the shipment the part finally arrived and it fits perfectly 🙂
What i liked most about this little project is to realize how technologies like 3D printing empower you to take control and give a ‘second life’ to already obsolete but still valuable equipment.
So if you ever find yourself in a similar situation, don’t be afraid to explore the DIY route and share your solution with the community.
After all, collaborative efforts make technical challenges more manageable for everyone involved.
Thanks for reading!
- https://www.hubs.com/knowledge-base/what-is-multi-jet-fusion/#mjf-vs-sls-3d-printing-whats-the-difference ↩︎
Awesome, Thank you so much. This Plate was broken on my Mantis too
Hey, I’m glad if it helped you 🙂